Dinner: Creating your CI pipeline for net core app container and AzureDevOps Part 4/4 – Final steps and summary
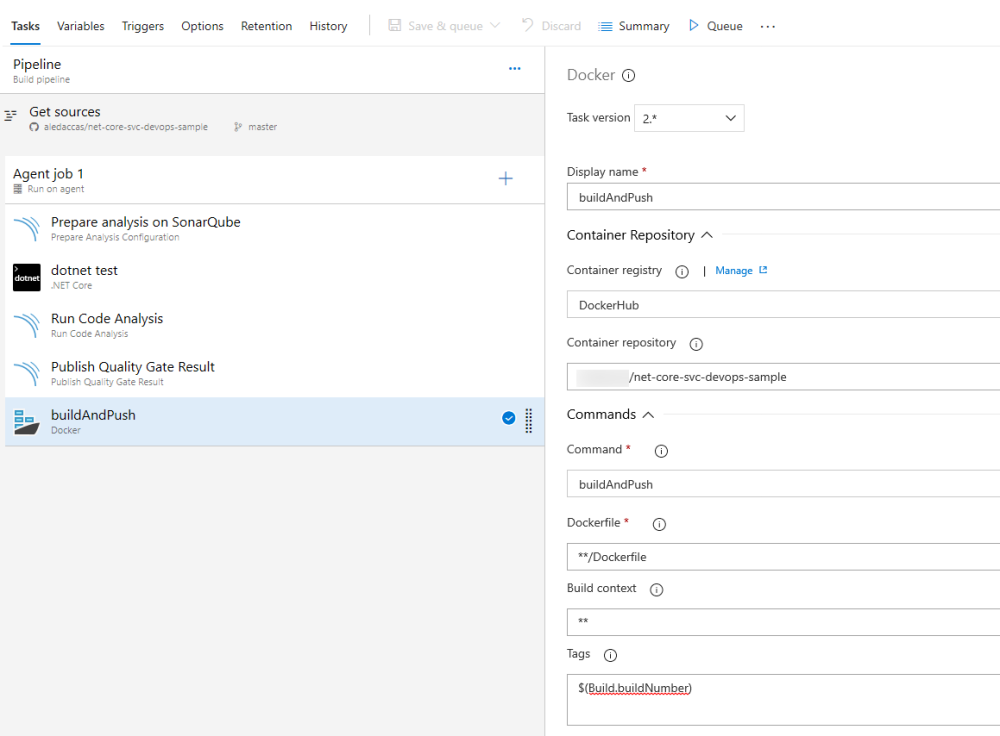
In previous post, we´ve discussed about the docker build and publish tasks in the Azure DevOps pipeline.
In this post we will add the final tasks to pipeline and setup triggers to execute the pipeline automatically, enabling the continuous integration.
Tag your code
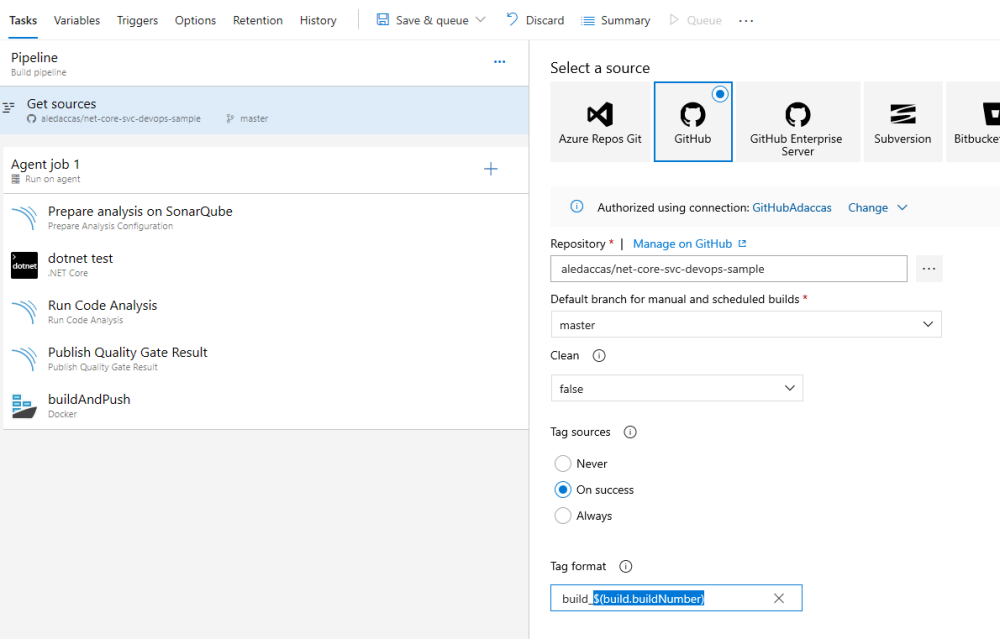
Your pipeline is almost ready, the last task to add is tag your source code. Go to Get Sources task and change the Tag Sources property to On success. You can also customize the tag format, but is a good idea to use the $(build.buildNumber) pipeline variable, because the tag must be a unique name.
Your pipeline task are now ready, you need to add a trigger to start the pipeline automatically during continuous integration of your code. To do this, click on Triggers menu. Then enable the continuous integration trigger and select which branch you want to monitor (in this example branch master).

To test your pipeline you can simply do a pull request from a branch to master and the pipeline will start automatically. The pipeline results will be as follow:
Pipeline logs: It shows all executed steps of your pipeline, if you click in each step, a detailed log will be shown.

Tests results: The tests resuls page will show all tests executed in your test project, if a test fails, it will appear in a list and also the reason the test has failed.

Summary page: The summary page is responsible for showing all linked information in your pipeline, since the commits made, until deployments (in this case the deployment does not exists).

Also you can check the SonarQube Analysis result of analysis. You can also click on Detailed SonarQube report and you will be redirected to the SonarQube project page:

In this page you have all information regarding bugs, vulnerabilities, code smells and the code coverage.
If look to your repository you will see a new tag in GitHub:

Now everytime you commit a code and your pull request is approved to the master branch (or the branch you defined as trigger) will start the build pipeline, analyzing, testing and publishing your image wherever your need.
For any doubts just leave a comment.
Cheers!